MANAGE LETTERS
The CASI system has a range of tools to help you to quickly create, edit and generally manage letters relative to an incident, based on a series of standard templates that are managed by Head Office
Once letters have been completed, they can be automatically converted to PDF format and added to specfic activities and/or emailed out
Open the required incident and click the Activity/Timeline tab in the Incident management window
Select Manage Letters in the side bar menu to open the Manage Letters window
The list will display any previously created letters for the incident, otherwise it will be empty
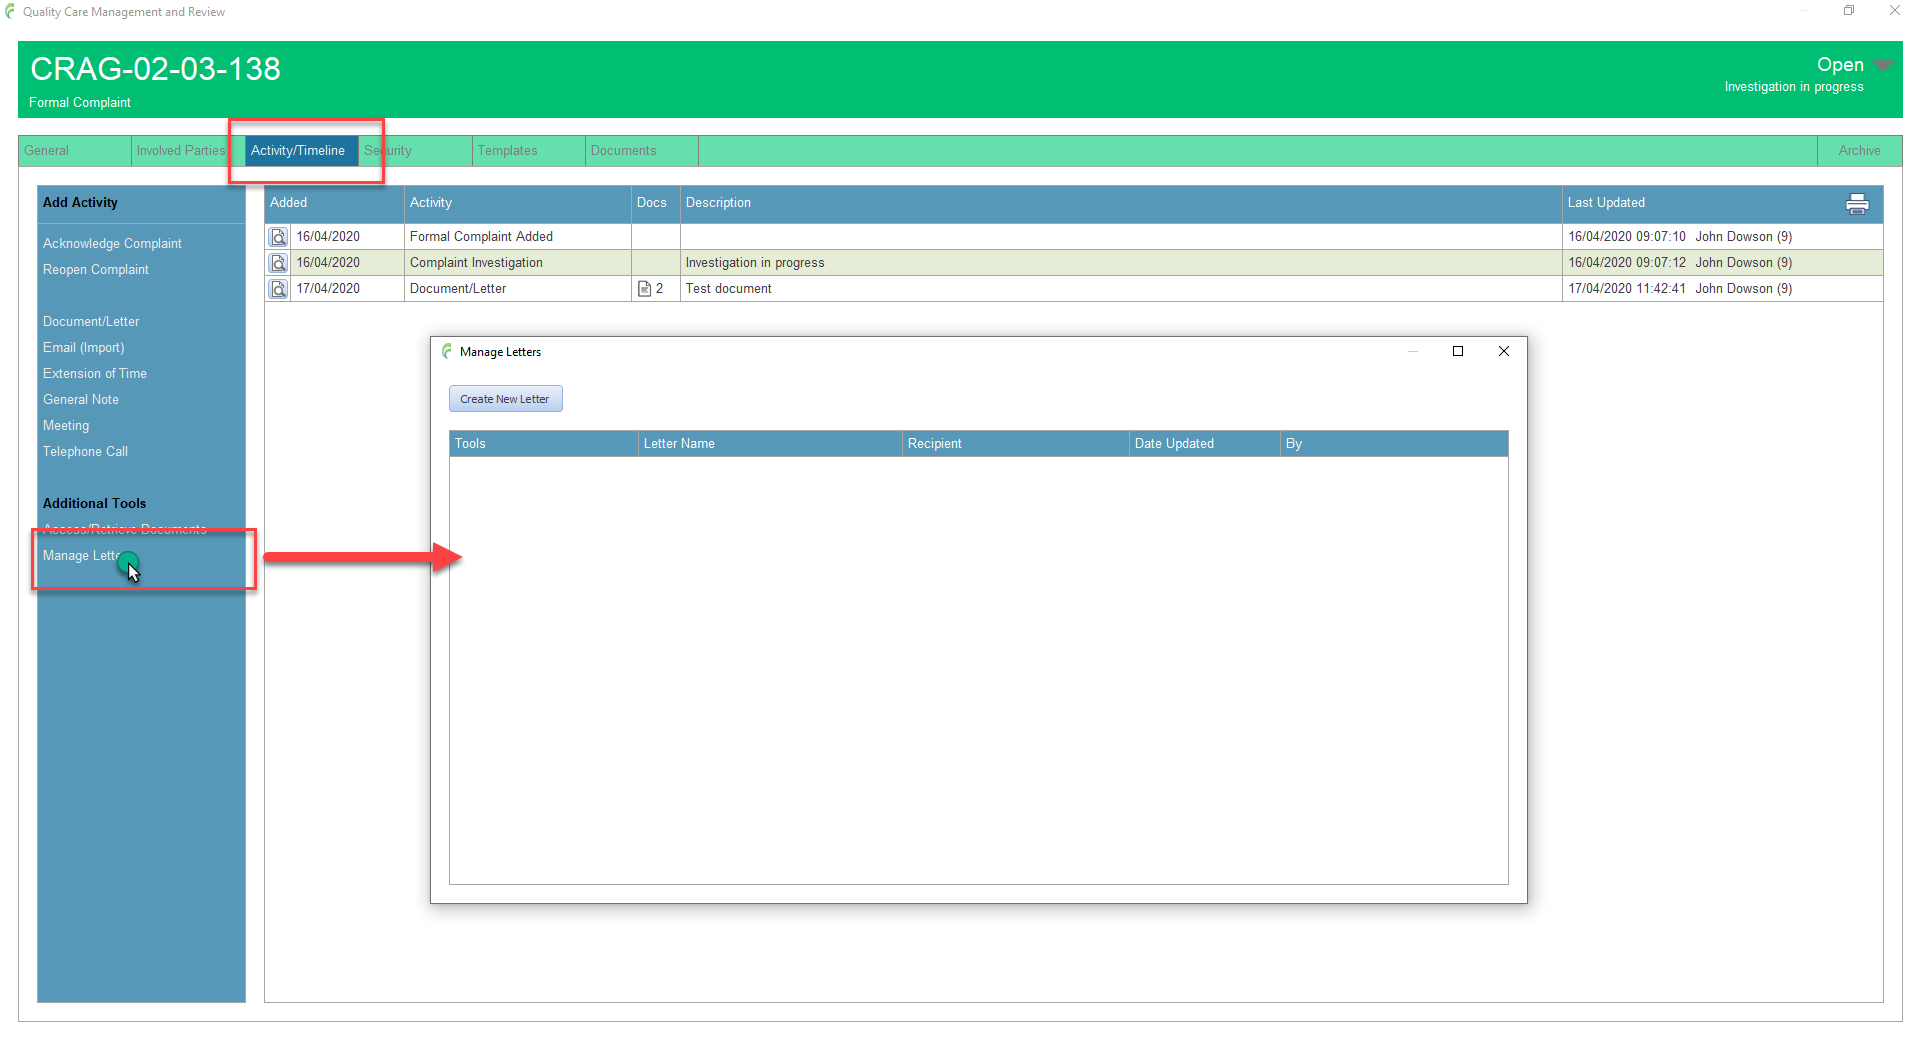
The Manage Letters facility can also be accessed from the Complaint Investigation Form and the Accident/Incident Report

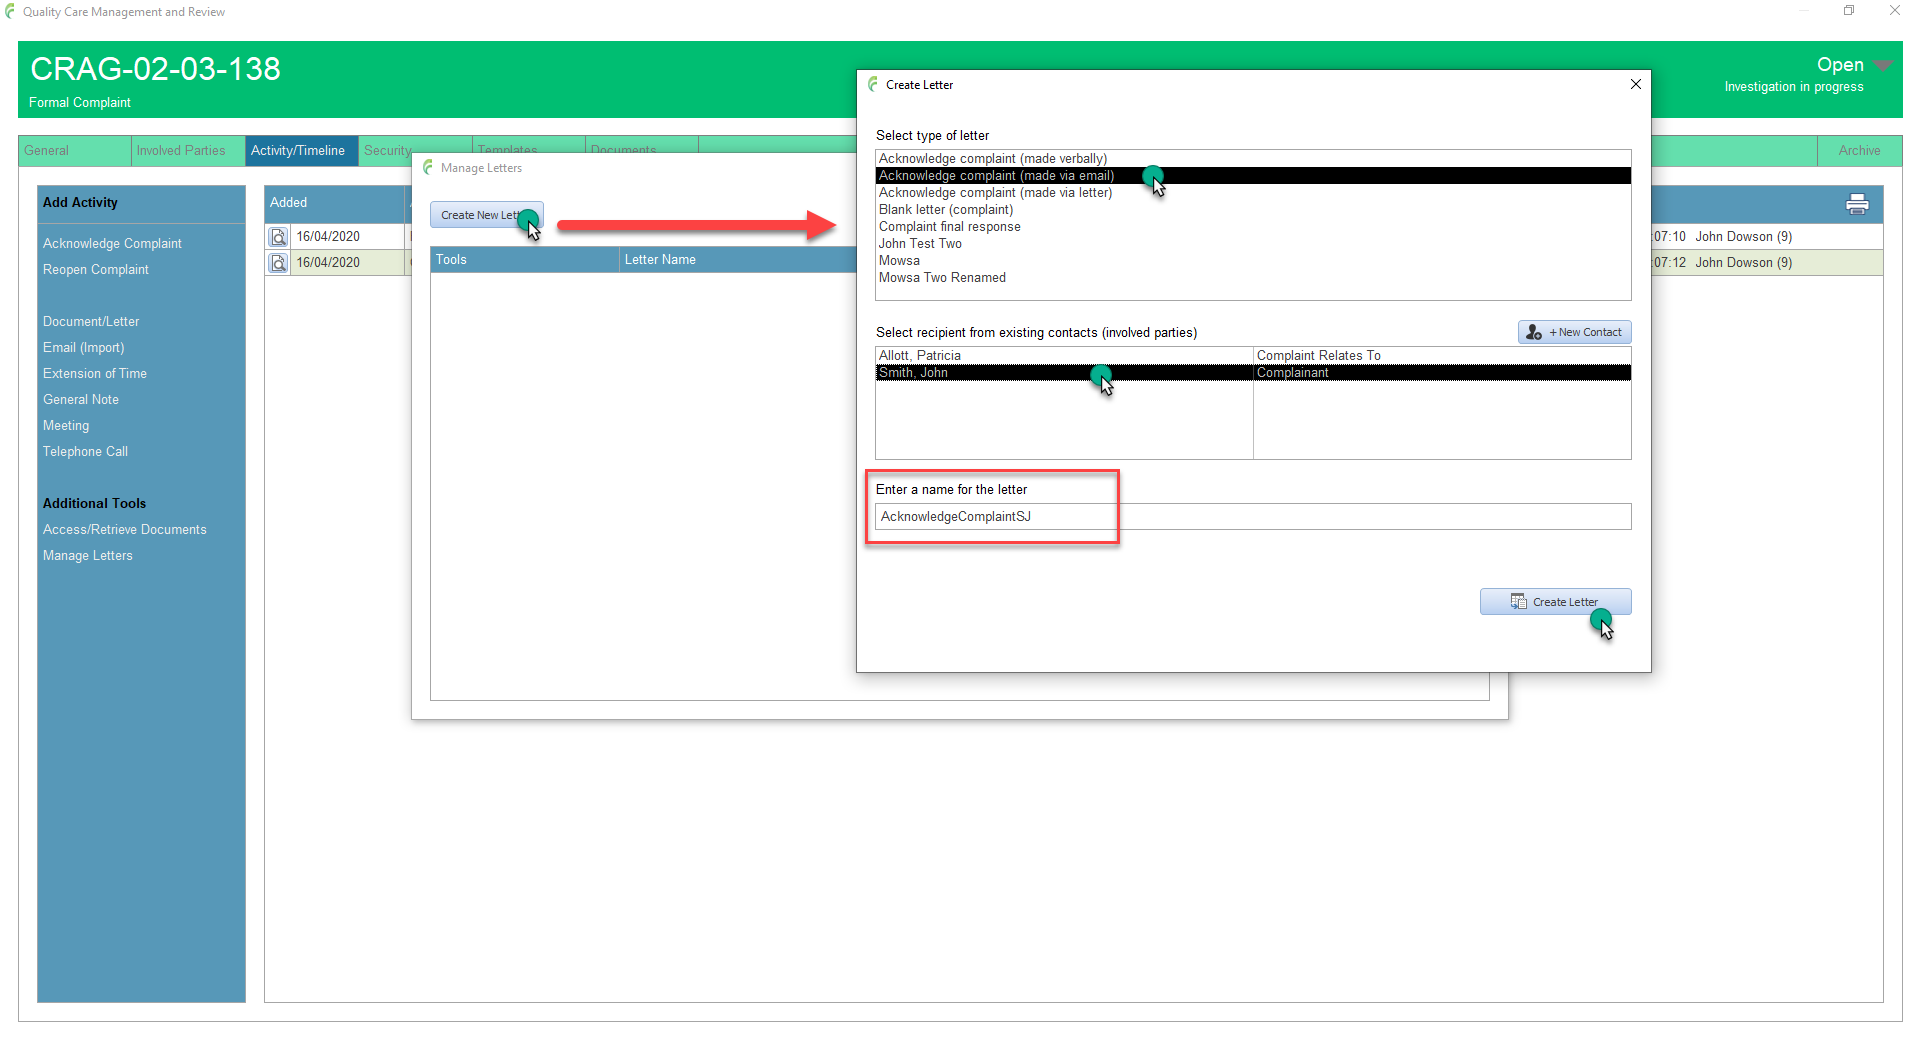
Create New Letter
Click the Create new letter button to open the Create Letter window
Select the type of letter required
Select who the letter is for
Enter a name for the letter. Depending on the type of letter selected, CASI will suggest a name based on the letter type and the initials of the recipent selected. This name must be unique to the incident so you may be prompted to enter a new name if it already exists
Click Create Letter when ready
CASI creates the letter based on the selections made and a after a few moments, the personalised Word document will appear

Complete the letter as required and add your digitised signature in the normal way
Save and close the document
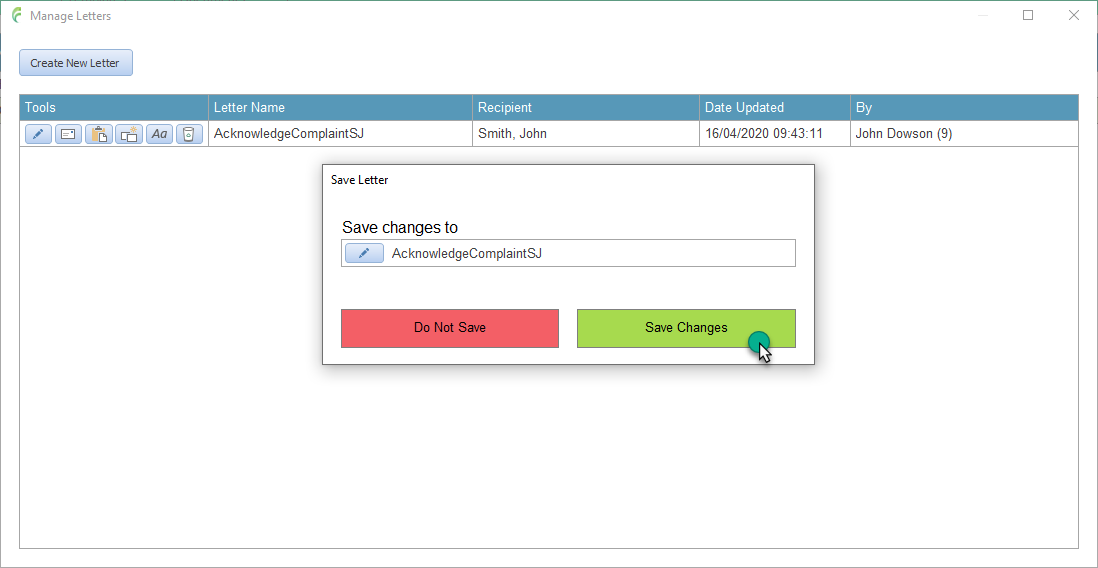
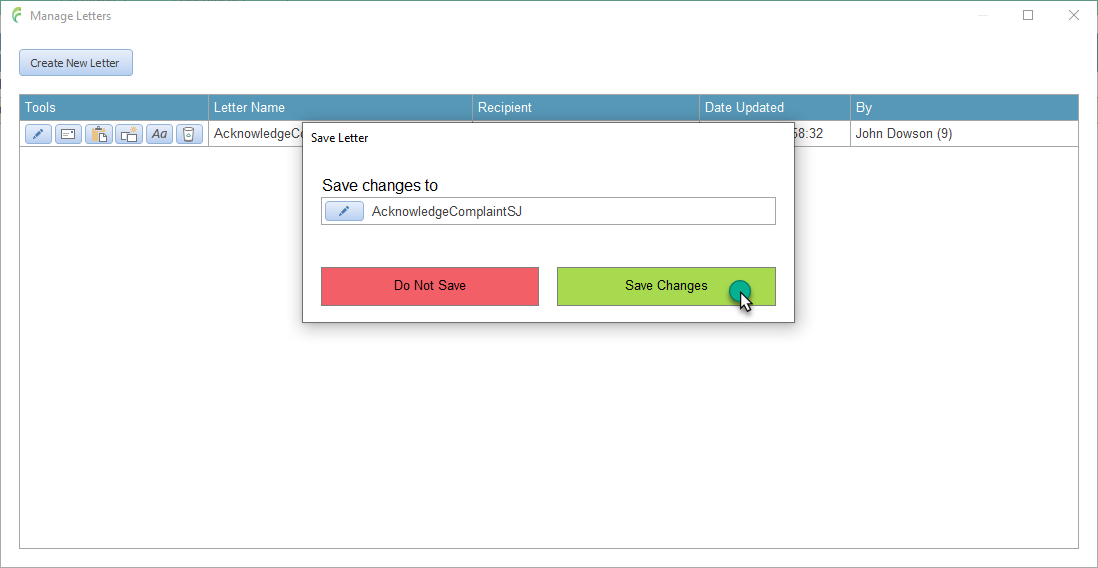
You will see that the new letter has been added to the list and a pop up box (Save Letter) has appeared. The edits you have made have been made in the Word document, you have to tell CASI to save the document to the system and you do that via the Save Letter box.
If you want to re-check your edits or you need to change the letter again, simply click the pencil icon next to the name of the letter to re-open the letter.
Otherwise, click Save Changes
Edit Letter
To edit an existing letter, click the Edit Letter icon in the tools section next to the required letter
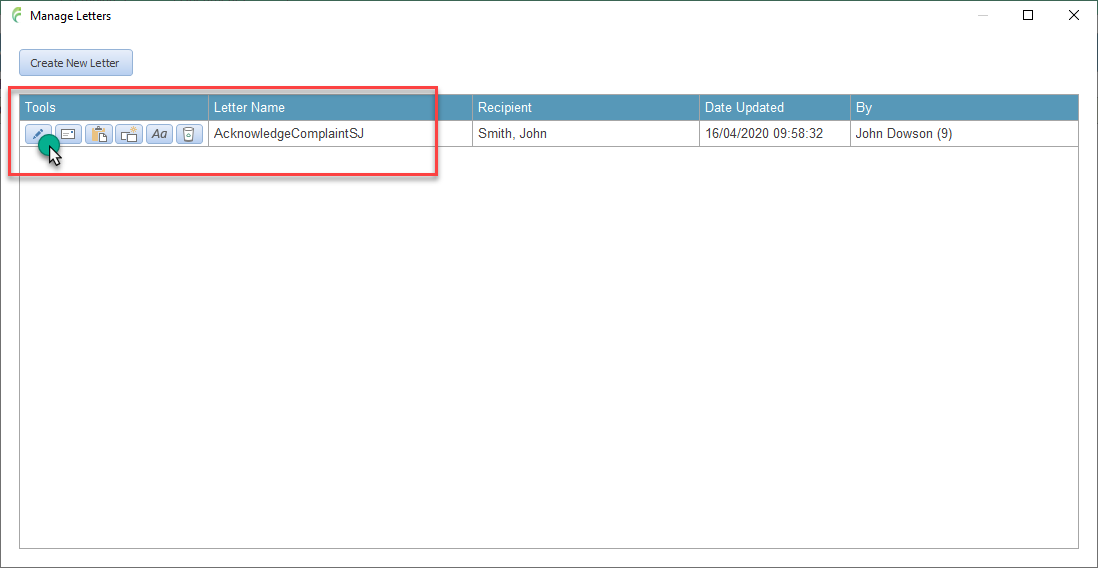
This opens the letter in Word
Make the required changes to the document then save and close it
Click Save Changes in the Save Letter pop up box
Email Letter
To email a letter, click the Email Letter icon in the tools section next to the required letter
Select the required recipient from the list of contacts associated with the incident. Alternatively, the document can be sent a blank email by clicking where it says; Click here to send to a blank email. The recipient’s email address can then be manually entered or contacts can be selected from your Outlook contacts list as normal.

The letter is automatically converted to PDF format and attached to an email ready for editing and sending
Emails sent relating to an incident should be recorded against that incident using the appropriate activity selected from the Add Activity menu examples include Acknowledge Complaint, Extension of Time etc. If the emailed letter does not relate to any specific activity type, it should be recorded using the generic Email (Import) activity
Tip. If you need to send multiple letters and or documents, use the Access/Retrieve Documents tool instead
Send to an Activity
Letters that have been emailed or posted out relative to an incident should be recorded against that incident by using the appropriate Activity type for example, a letter notifying people about an extension of time to respond to a complaint would be recorded in the Extension of Time activity. When a specific activity type is not appropriate, the general Document/Letter activity should be used.
The Send to activity tool automates the task of recording letters against a range of activities. Note that not all activities are listed or available from this tool. This is because when certain activities are raised, for example in the case of a complaint being repoened, the system has to check and validate that certain conditions have been met and this is not possible to do this from within the Manage Letters tool.
In these instances, the activity has to be raised first and then any relevant documents, incuding letters created by the system, should be added. An example can be viewed here
Click the Send to Activity icon in the tools section next to the required letter
Select the required Activity type
The selected letter is automatically converted to PDF format and attached to a newly created activity of the selected type
Complete the activity details and click Save and Close

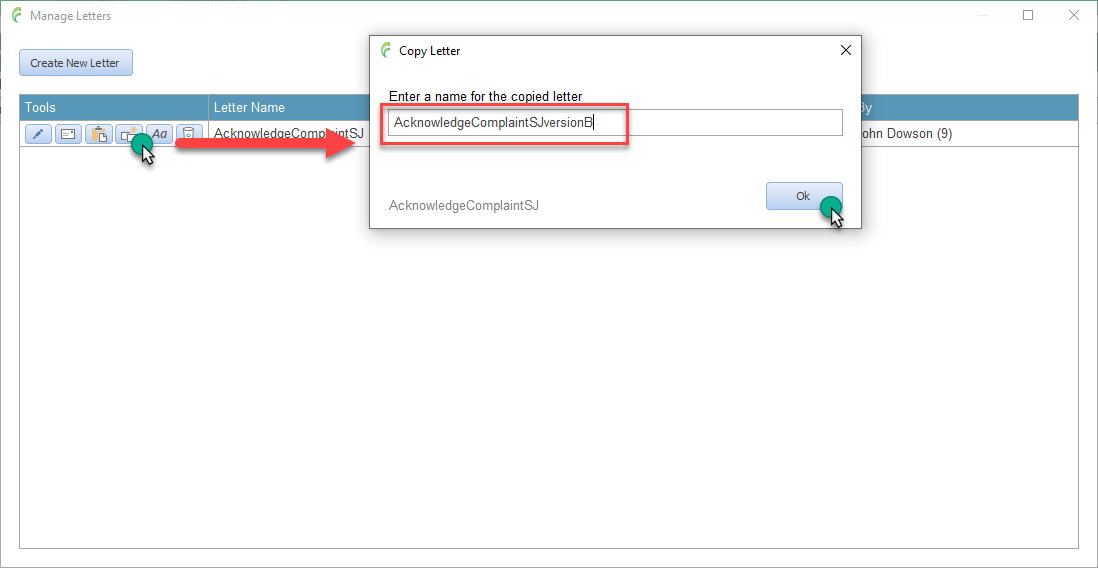
Copy a Letter
The copy letter tool creates a new letter based on a copy of an existing letter. The newly copied letter can then be edited using the tools discussed above.
Click the Copy Letter icon in the tools section next to the required letter
Enter a new name for the letter in the Copy Letter pop up box. This name must be unique to the incident so you may be prompted to enter a new name if it already exists
Click Ok when ready
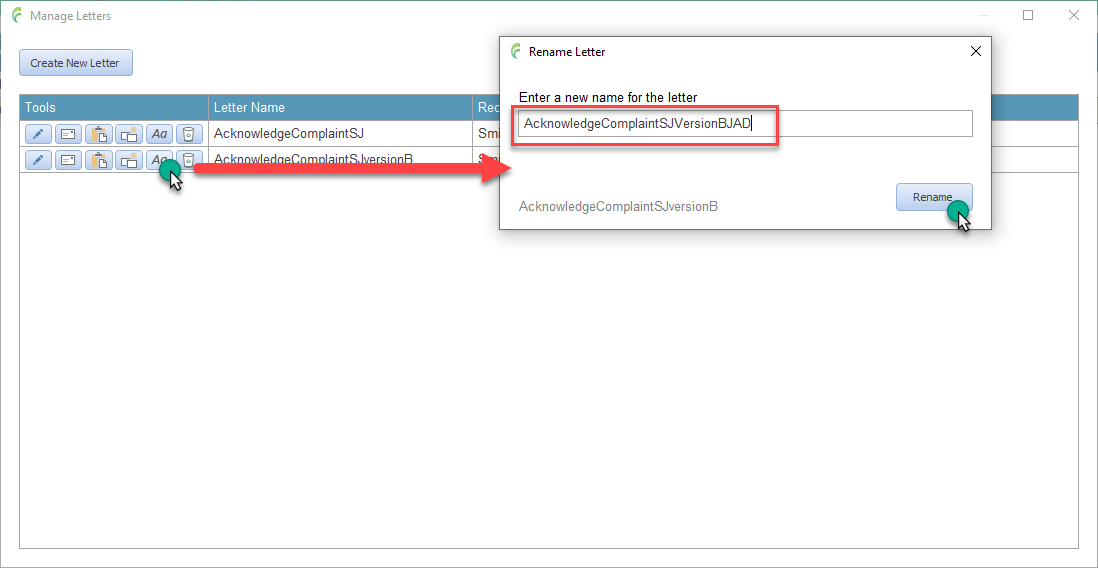
Rename a Letter
Click the Rename Letter icon in the tools section next to the required letter
Enter a new name for the letter in the Rename Letter pop up box. This name must be unique to the incident so you may be prompted to enter a new name if it already exists
Click Rename when ready
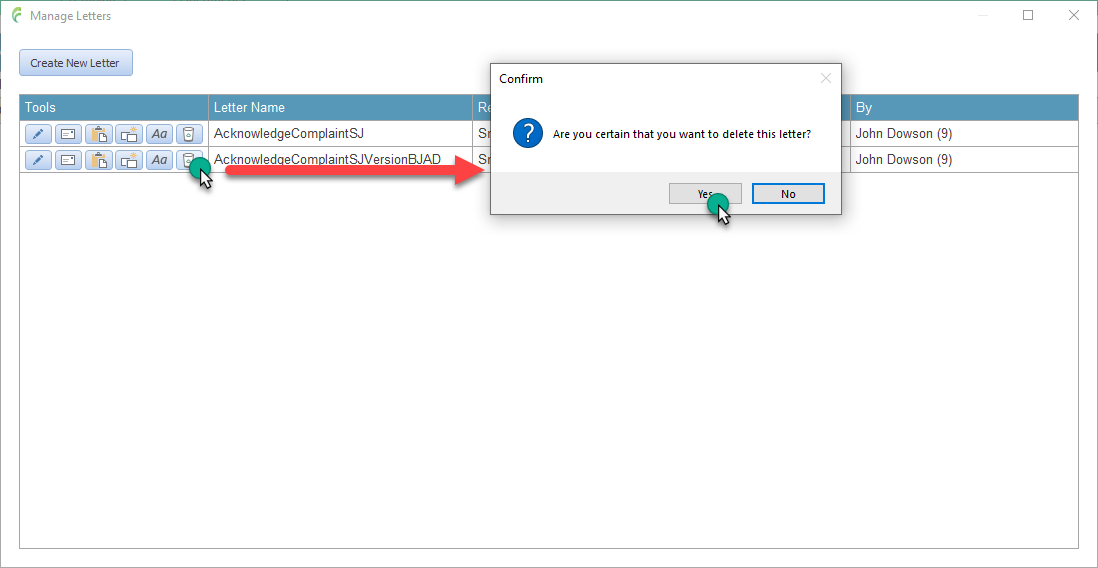
Delete a Letter
Click the Delete Letter icon in the tools section next to the required letter
Confirm the action