

EMAIL (IMPORT)
Used to add additional relevant emails to a complaint or incident
Open the required incident and click the Activity/Timeline tab in the Incident management window
Select Email (Import) in the side bar menu to open the Add Activity – Email (Import) window
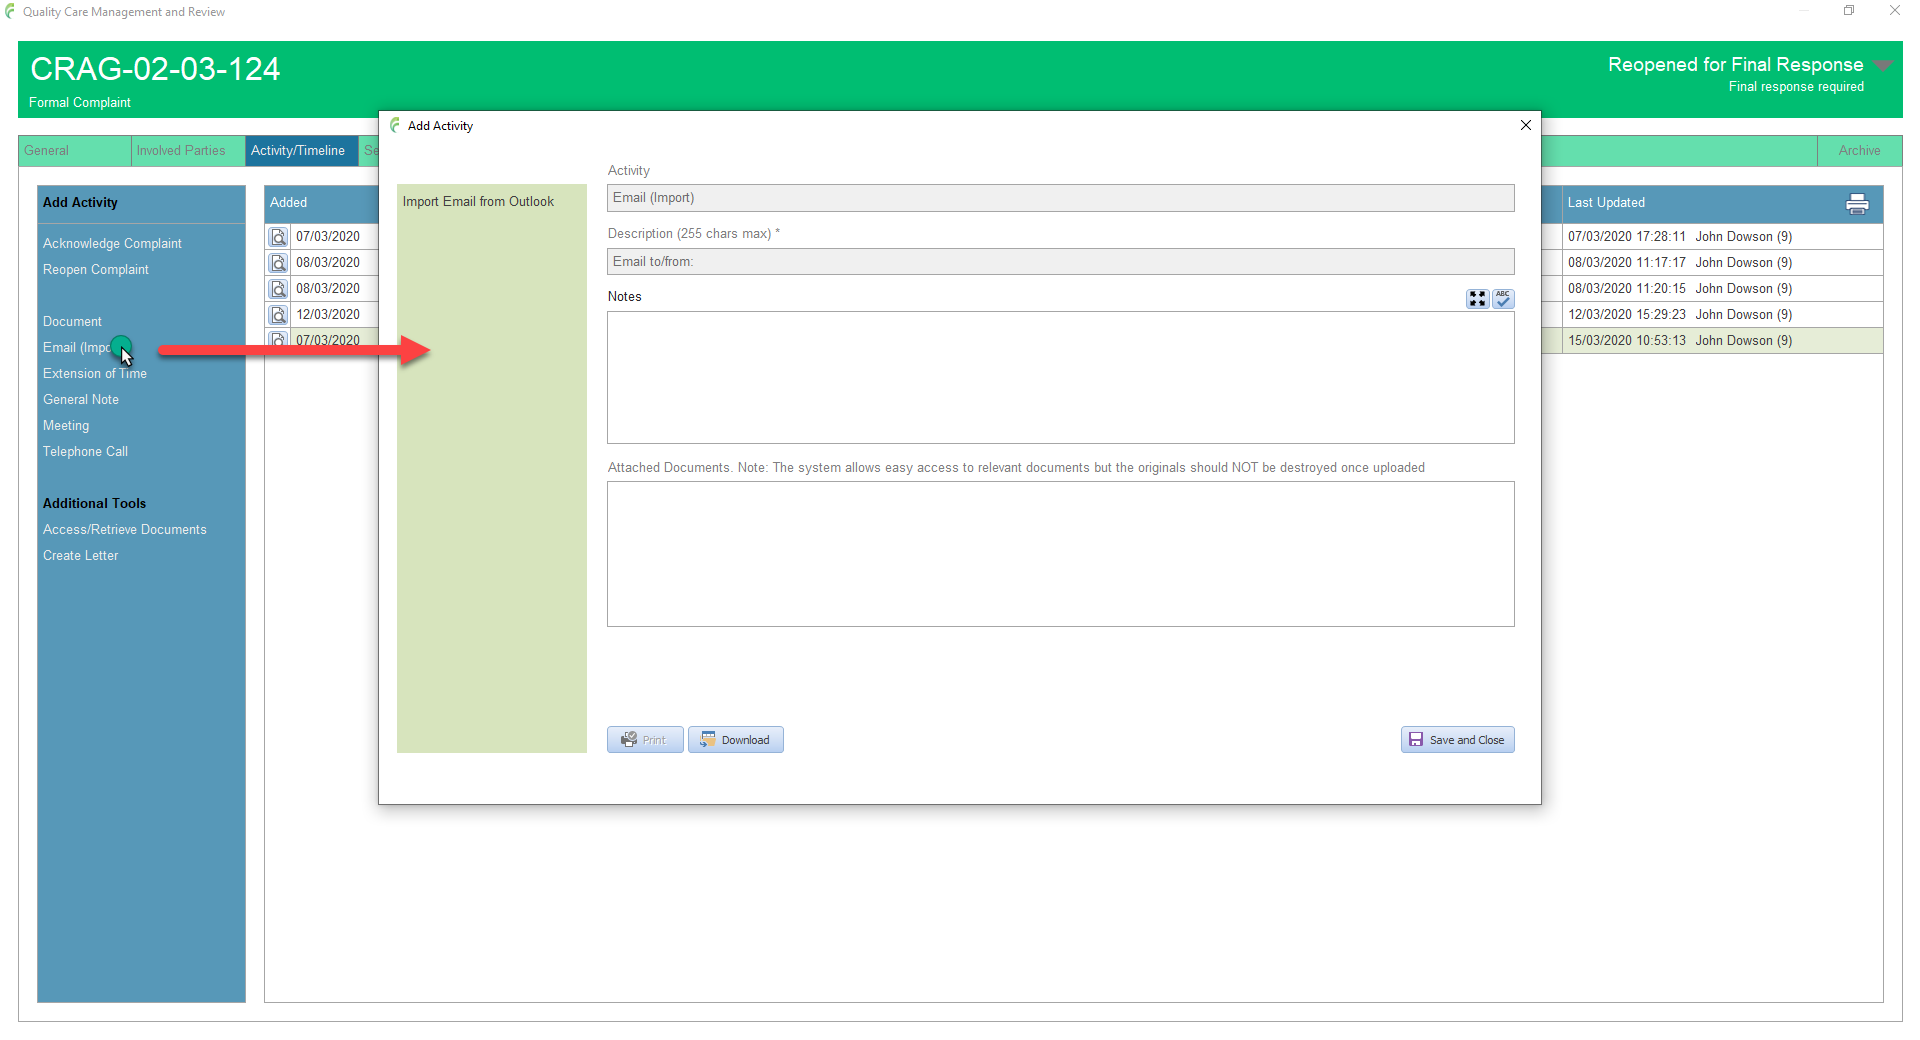
In Outlook, locate the email you want to import. It can be in any inbox, folder etc
Click on the email to select it (you only want it selected, not open)

Back in the Email (Import) window, click Import Email from Outlook and confirm that you have the email selected
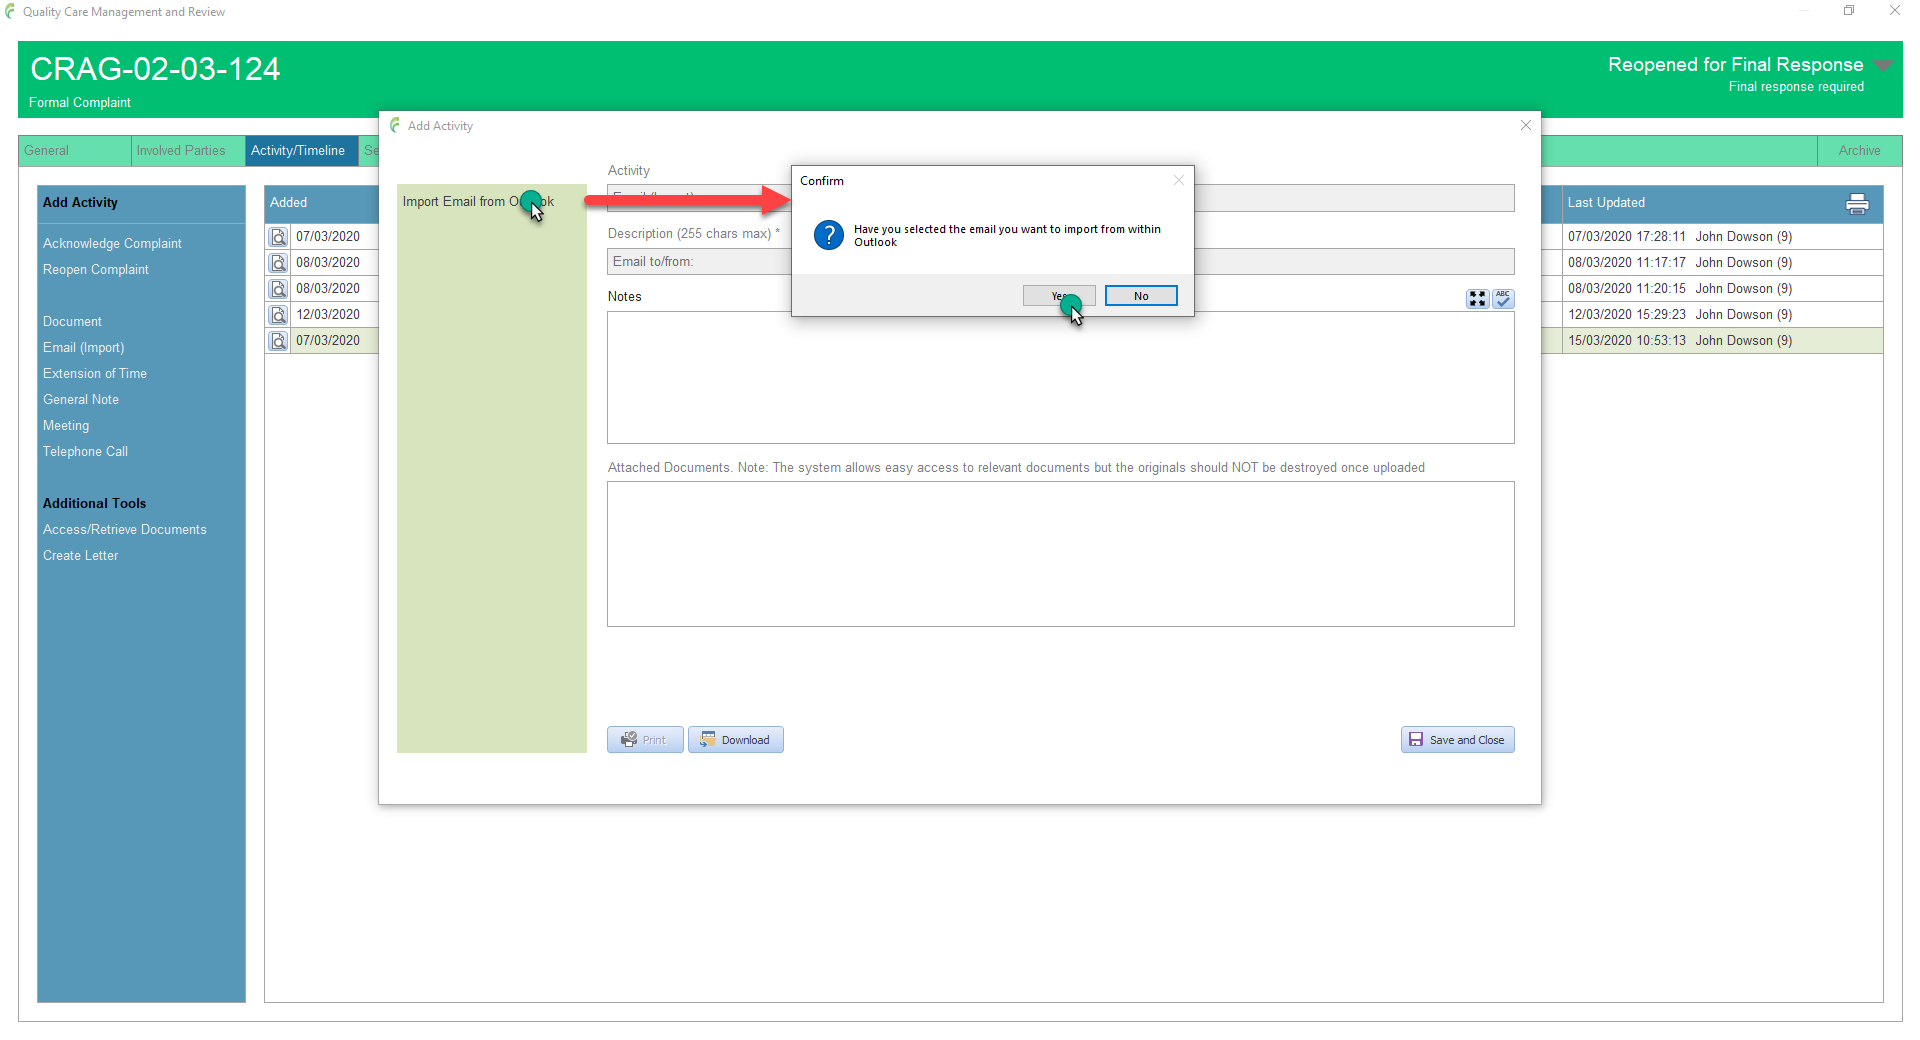
The Description box will update with relevant information taken from the email such as the From address, To address and the Email subject and the actual email will appear in the Attached documents list
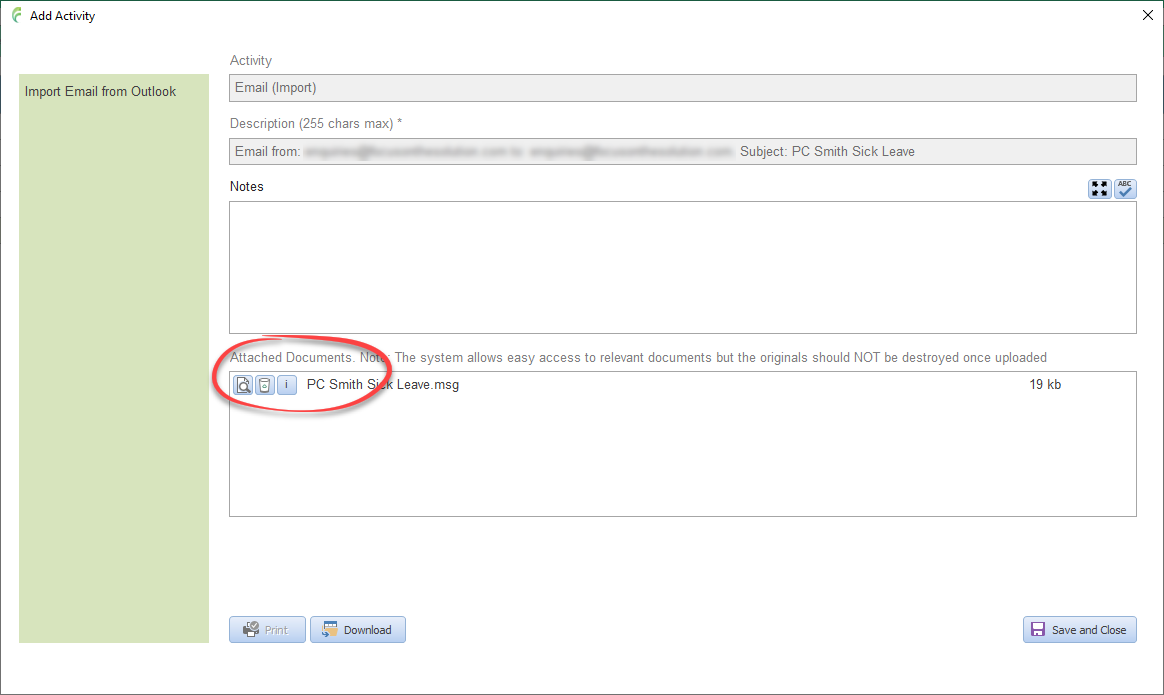
Click Save and Close
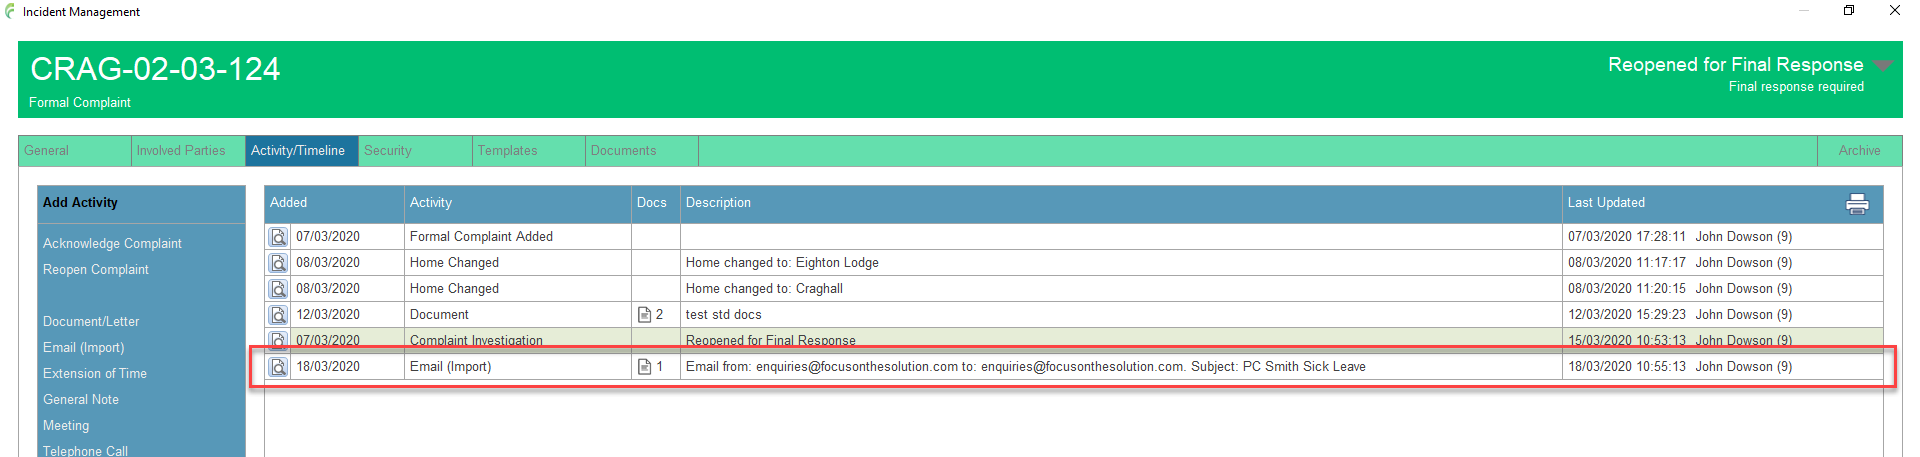
The Import Email activity is added to the Activity/Timeline
Viewing
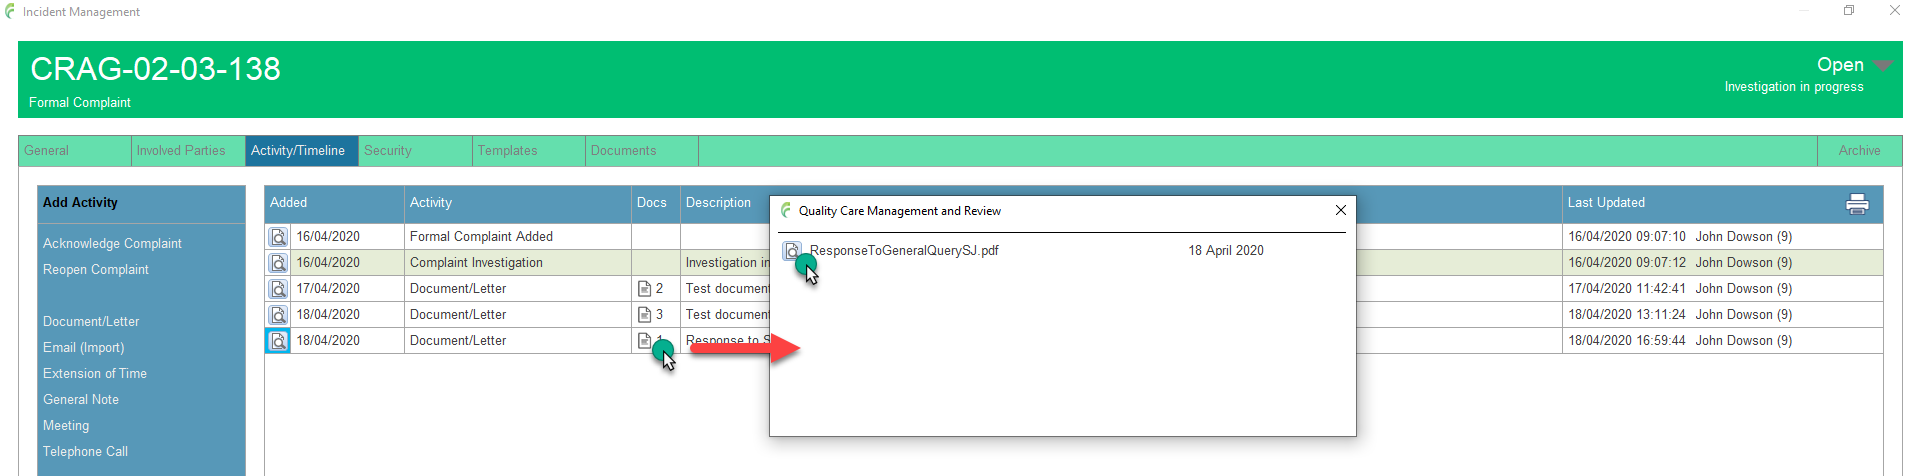
Documents added to an activity can be viewed directly from the activity list by clicking on the Document icon (a number next to the icon states how many documents are held for the activity) and selecting the required document from the pop up list
To fully open an activity, click the Open Activity icon to the left of the required activity
Attached documents are listed in the Attached Documents section and these can be opened by clicking the corresponding View Document icon
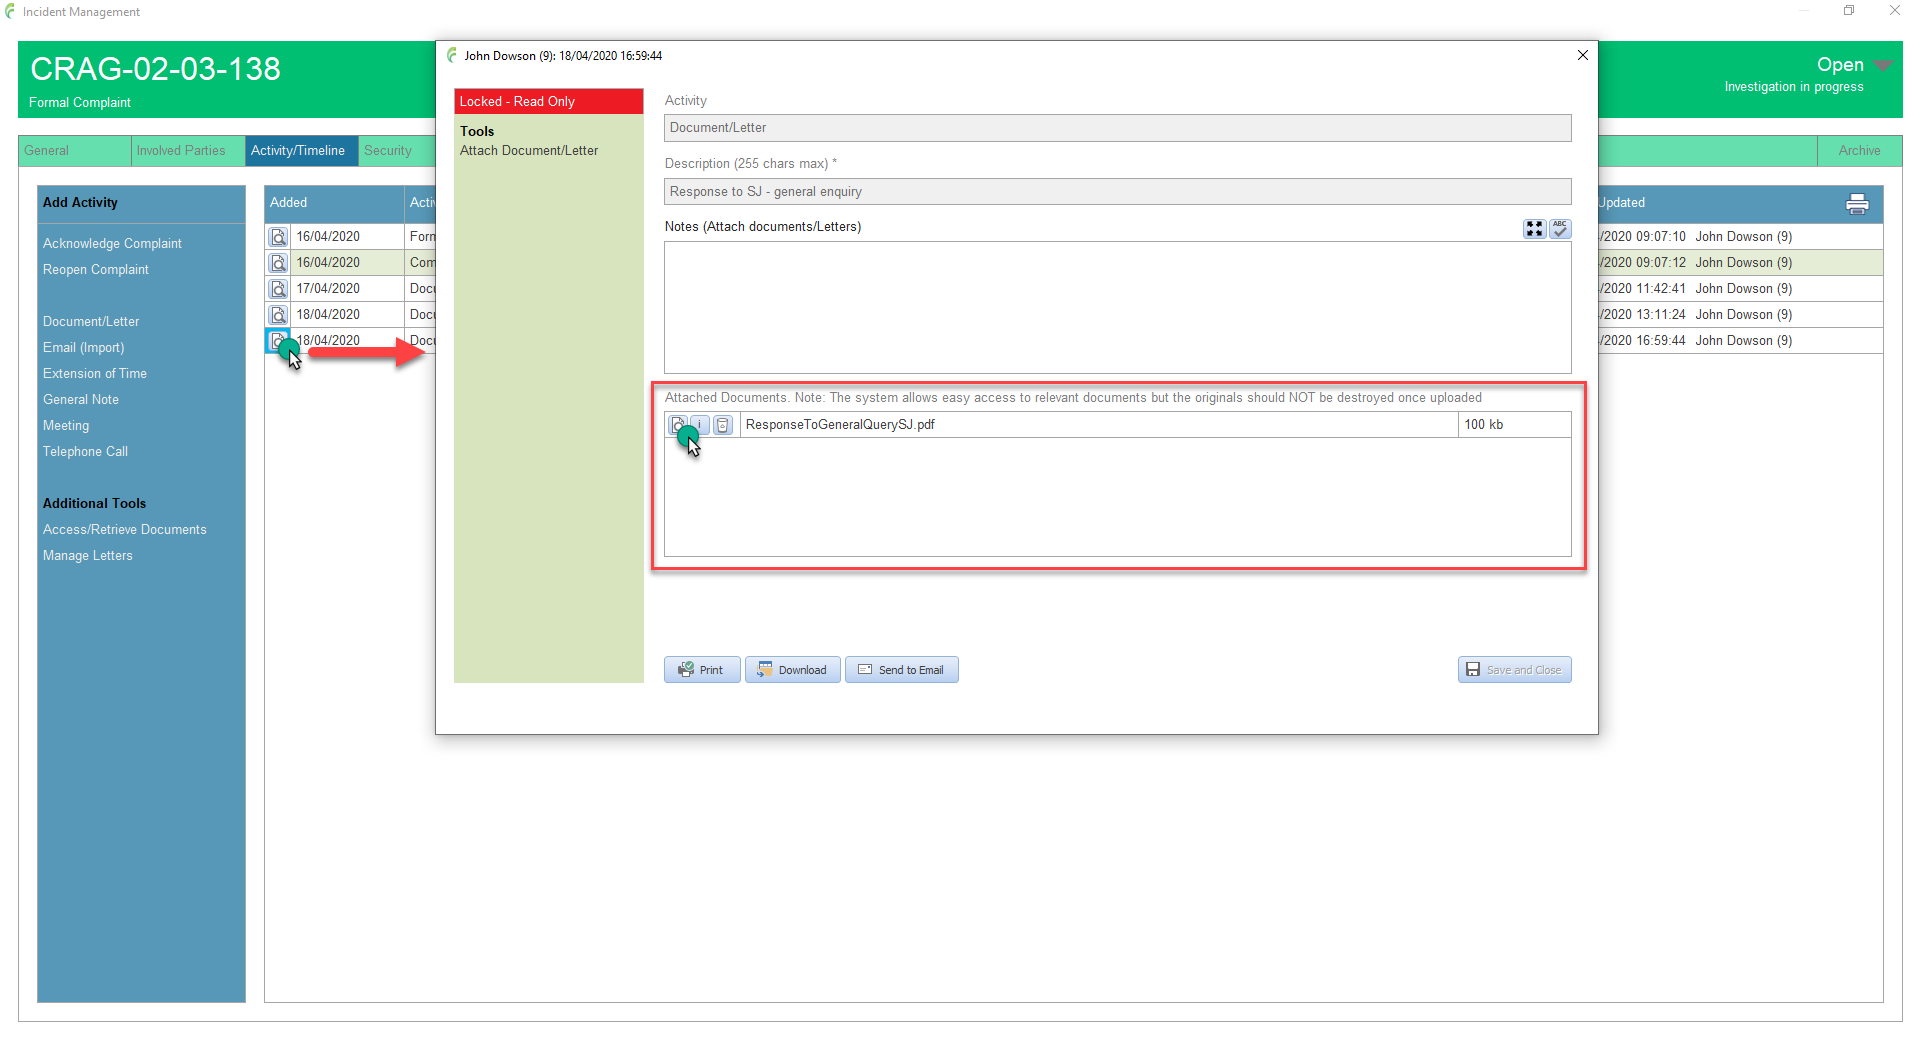
Most activities are locked from edit at the time they are saved and this is indicated by the red Read Only label above the side bar menu
There are some exceptions including Reporting to external bodies. These activities, which are accessed from within the relevant investigation forms, remain editable, until the form has been been appropriately approved (signed)
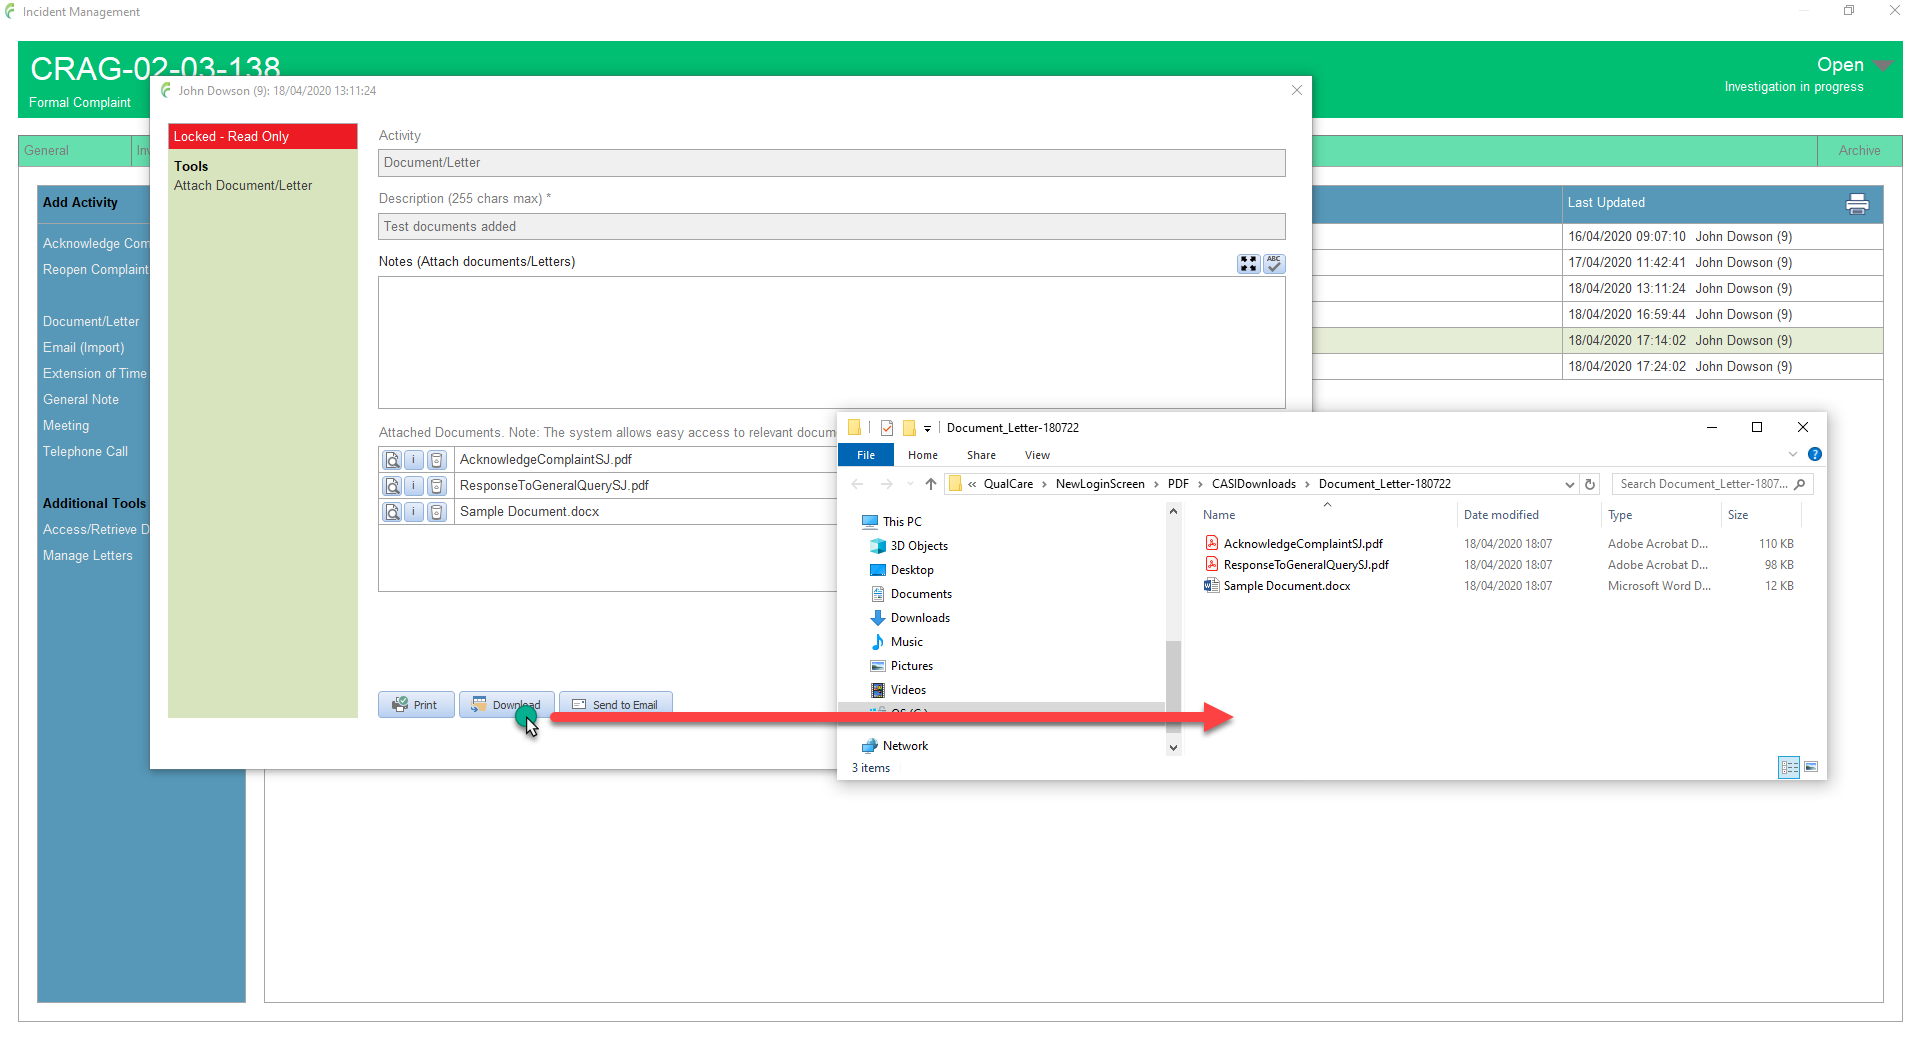
Download
Downloads all documents associated with an activity to a temporary folder
Click Download in the bottom tool bar
Note that the temporary download folders are deleted when you sign out of QualCare or QualCare is closed down
Send to Email
Attaches all documents from an activity to an email (note that this tool needs Outlook to be installed and available on the PC being used)
Click Send to Email in the bottom tool bar
Select the recipient from the pop up list or simply select send to blank email
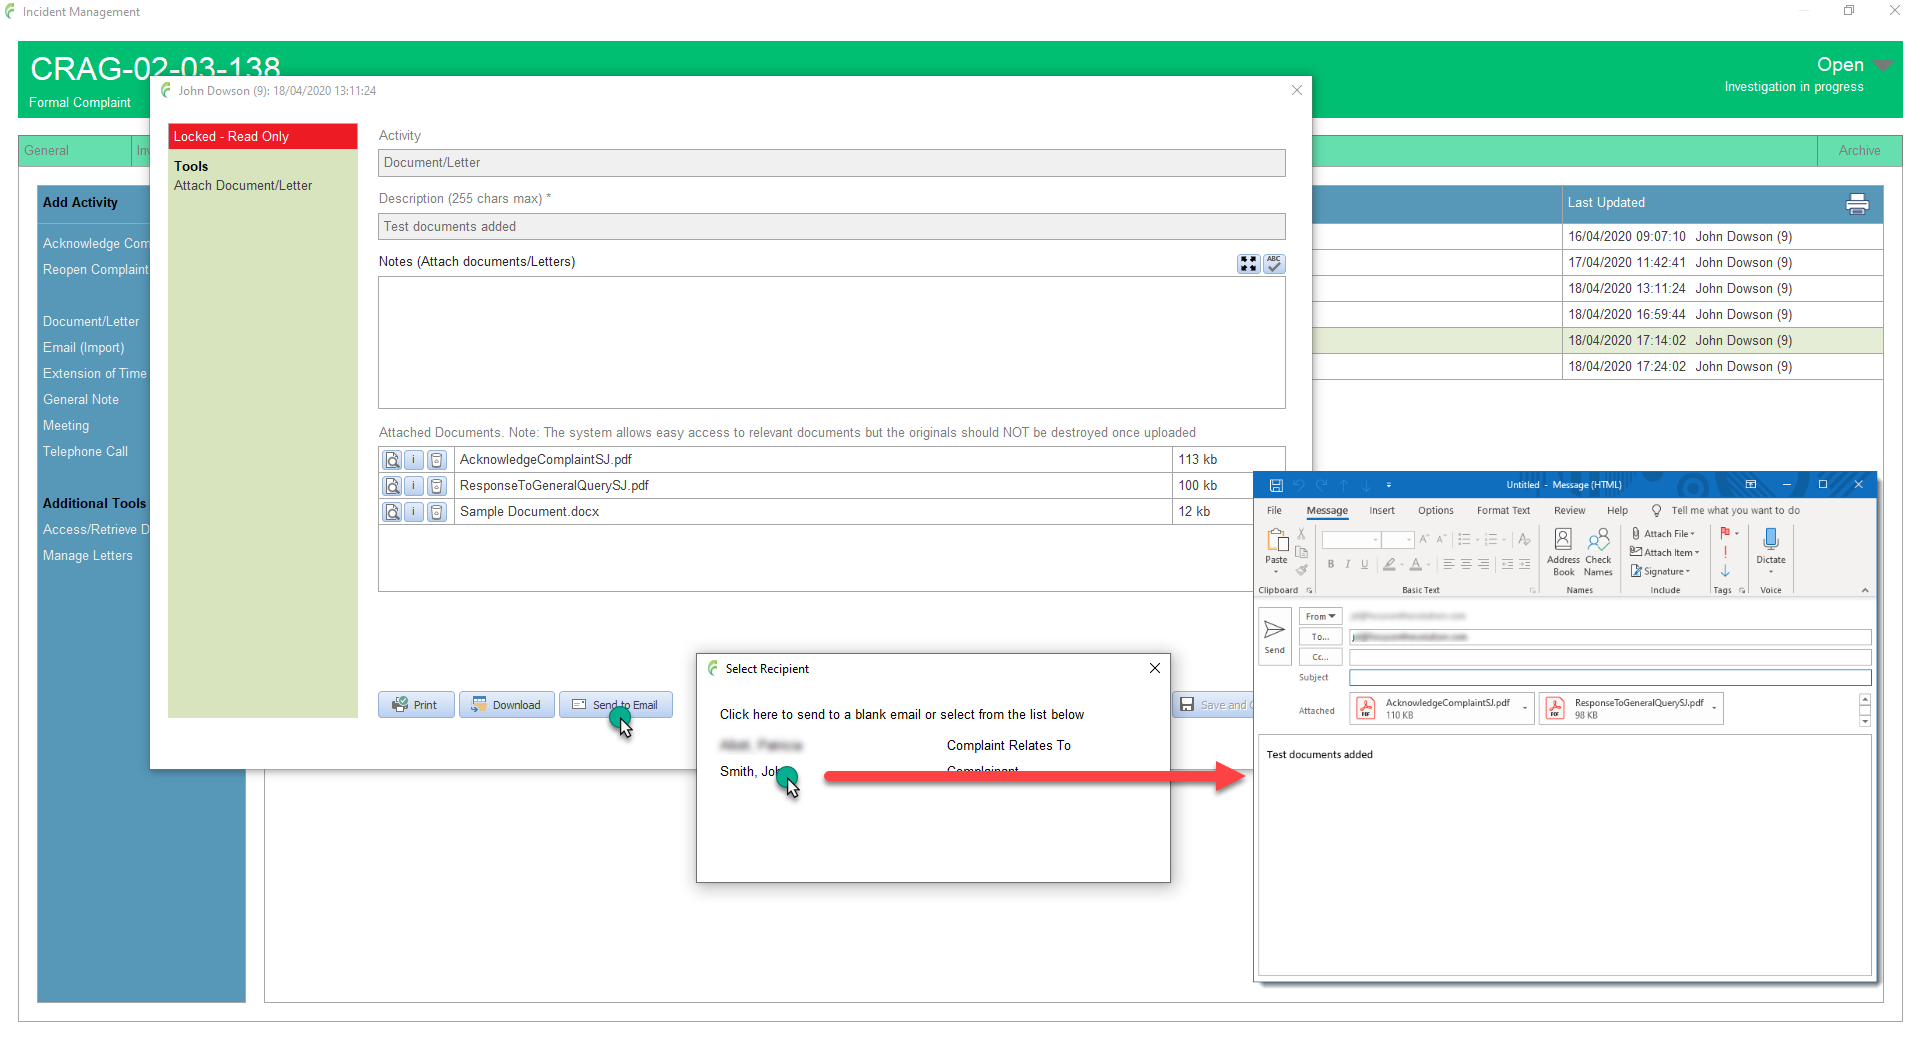
An email is created with the documents as attachments
Complete the email as required
Remember that any email relative to an incident should be recorded using the appropriate activity such as Email (import)